For the best motion experience, we recommend using the Reactor Motion System with SimHub. In our opinion, SimHub offers the best features and overall experience.
This guide explains how to set up the Reactor Motion System with SimTools.
First, download the latest version of SimTools 3 from the official download page:
Run the installer and follow the on-screen instructions. The default installation settings can be used.
A valid SimTools license is required to use the software. You can purchase a license from the official licensing page:
The Reactor Motion System is compatible with both the DIY License and the Professional License. Choose the license that best fits your needs.
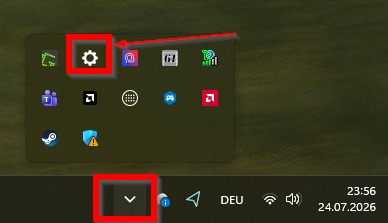
Start SimTools. After installation, the application is often located in the Windows system tray (notification area) on the taskbar, as shown in the image below.
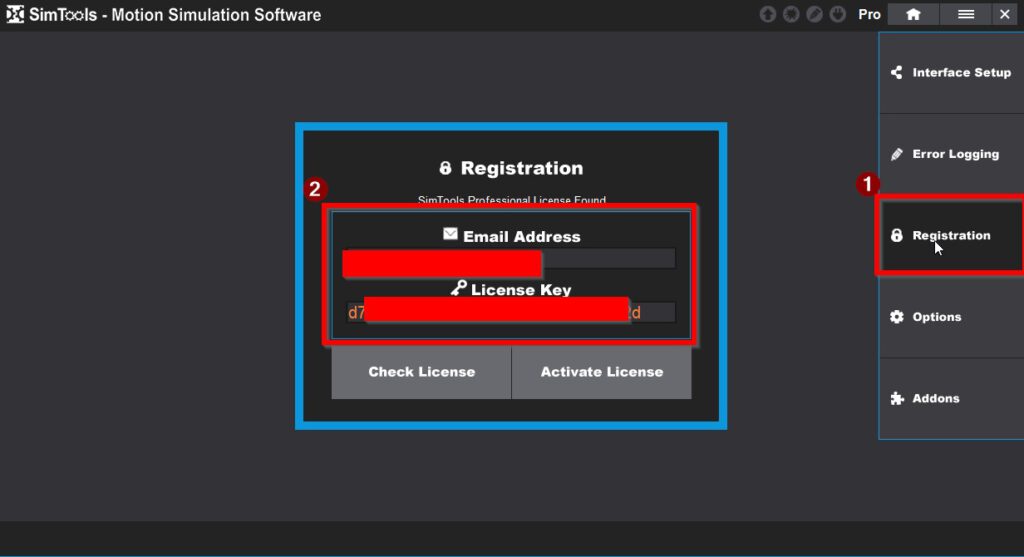
Open the License Manager in SimTools and activate your license using the license key you received after purchase.
Important: The Reactor Motion System must be plugged in.
Download the Reactor Motion System setup file and keep it as a .zip file (do not extract it).
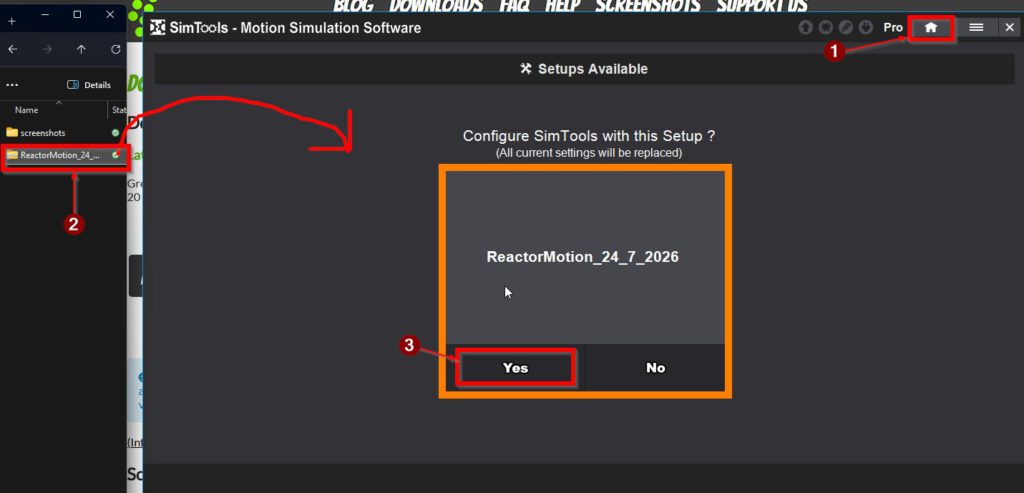
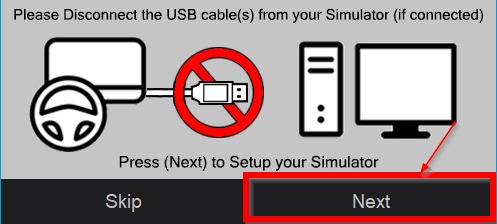
You will be asked to disconnect the Reactor Motion System.
Do not click the “Skip” button. This step is required for SimTools to correctly detect and configure the device.
Follow the on-screen instructions: unplug the Reactor Motion System and press next
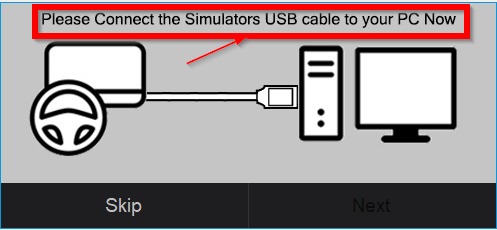
After disconnecting the Reactor Motion System, SimTools will ask you to plug the device back in.
Reconnect the Reactor Motion System. Once the device is detected, the setup will continue automatically.
DO NOT SKIP
After the device setup is complete, open SimTools again.
If you cannot find the application, check the Windows system tray (toolbar/notification area), as SimTools is hiding there when closed.
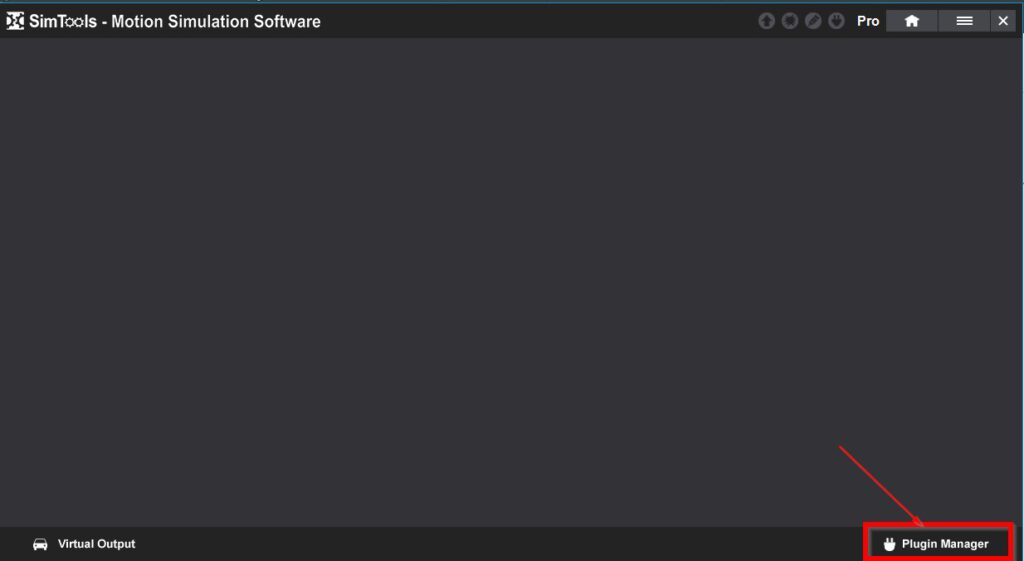
Next, navigate to the Plugin Manager in SimTools.
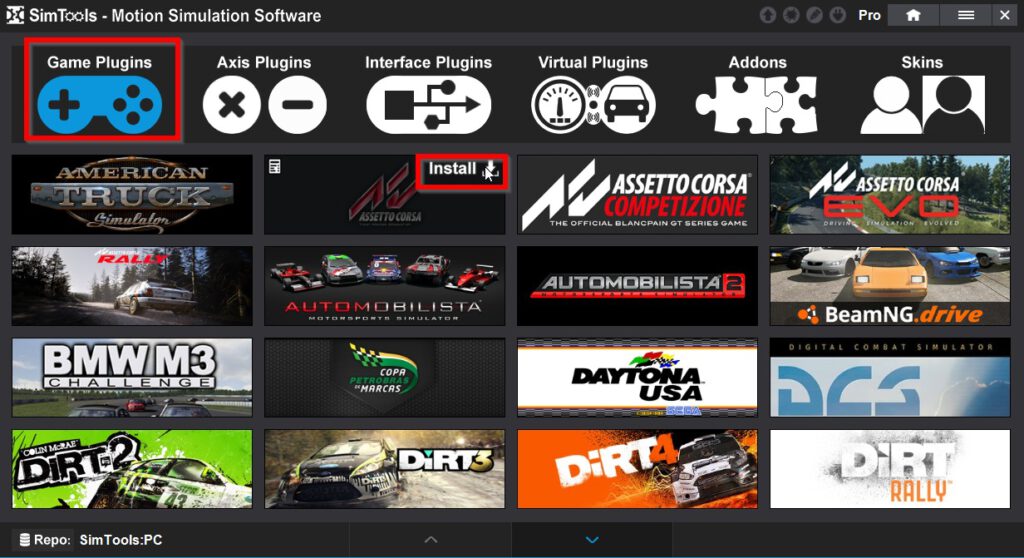
In the Plugin Manager, navigate to the Game Plugins section.
Select the game you want to use with the Reactor Motion System and install the corresponding plugin.
After the installation is complete, the game will be available for configuration in SimTools.
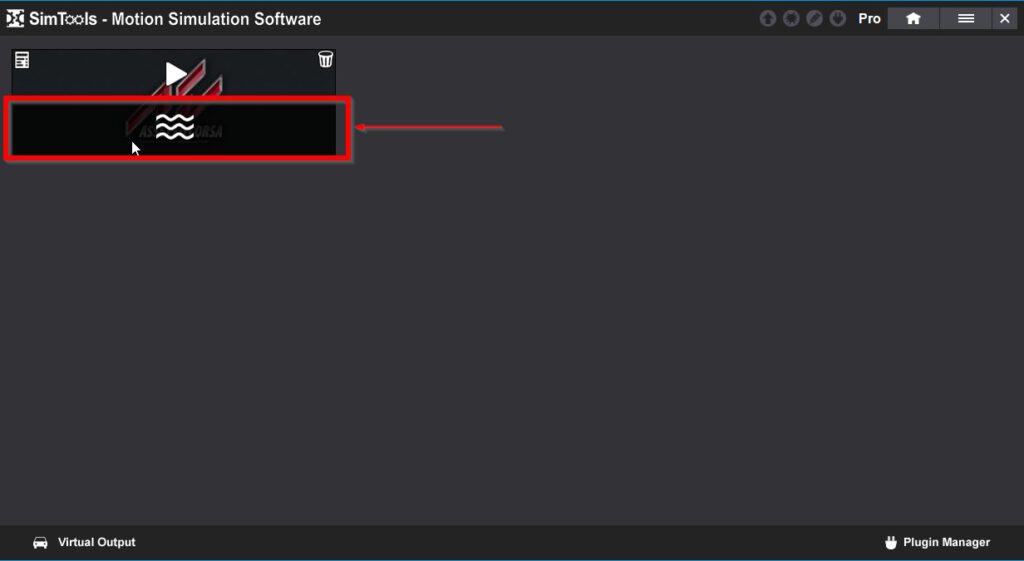
After installing the game plugin, open the Motion Settings of the installed game plugin.
This section allows you to configure the motion output and adjust the settings for the Reactor Motion System.
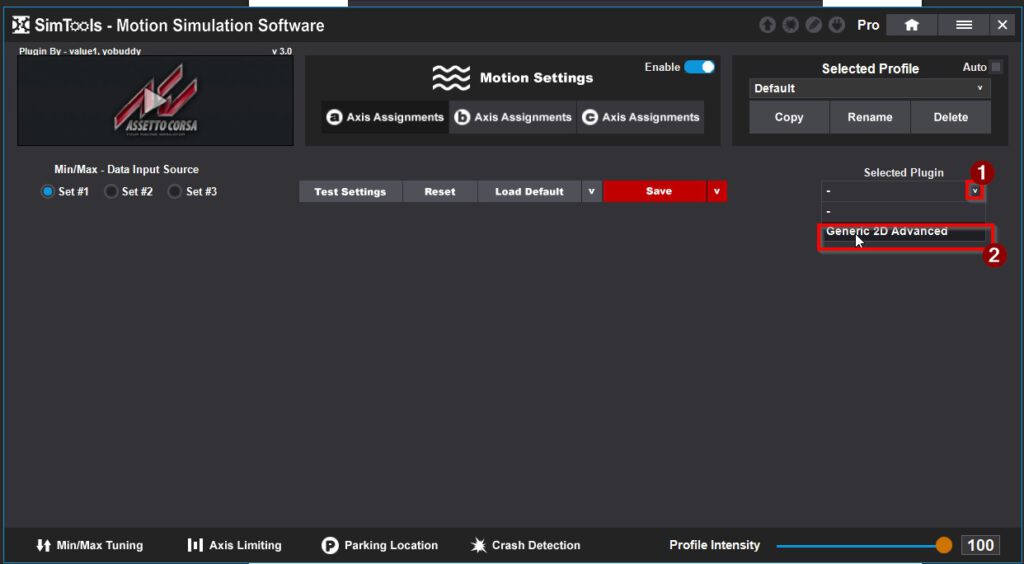
In the Motion Settings of the installed game plugin, select the preconfigured Axis Plugin Generic 2D Advanced
Use the drop-down menu (1) to select this option (2), as shown in the image below.
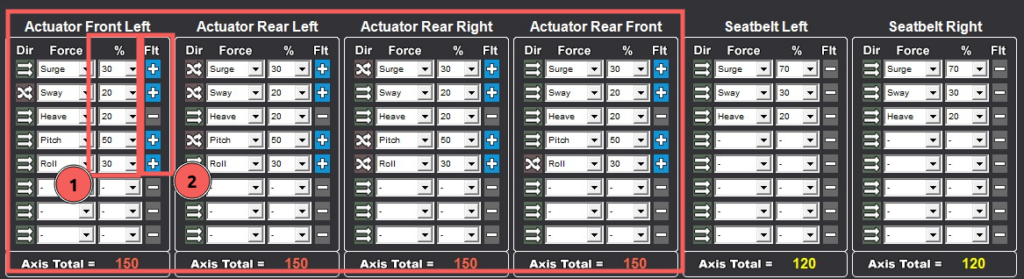
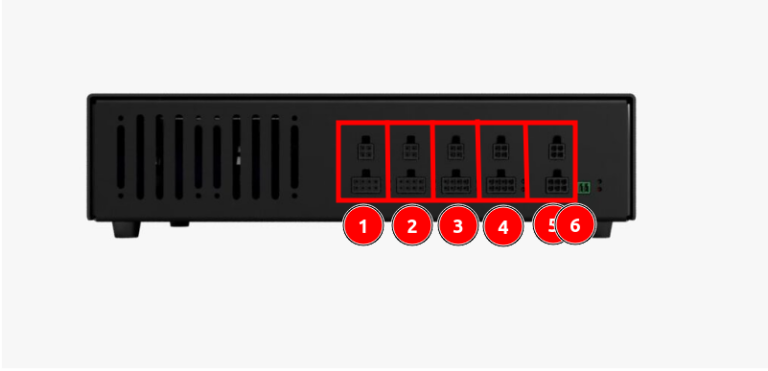
The axis configuration is mapped according to the official Reactor Motion System motor assignment:
No changes to the axis mapping are required when using the provided Generic 2D Advanced Axis Plugin.
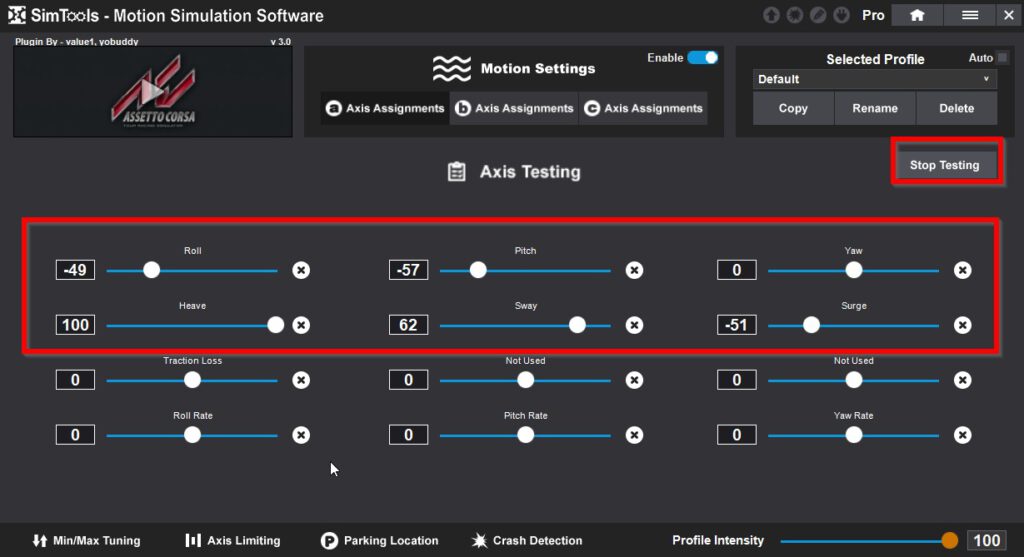
The Reactor Motion System can now be tested.
Click on Test Settings to open the test interface and verify that all actuators are responding correctly.
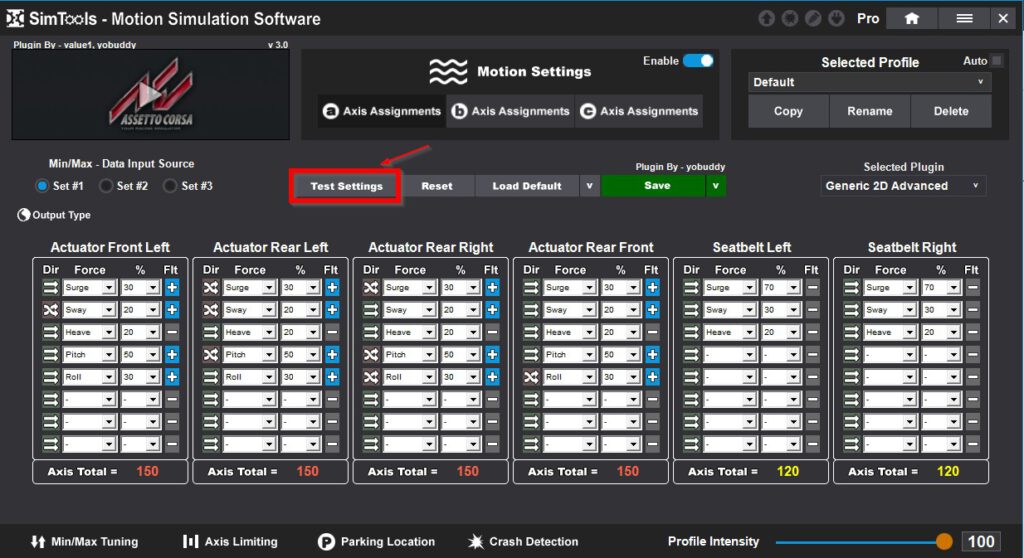
The system should react to the following motion axes:
Once the test is complete, click Stop Testing to end the test mode.
The Reactor Motion System is now ready to use.
Click on the game image of the installed plugin to start the simulation and activate the motion output.
Once the game is running, the Reactor Motion System will respond to the simulation data and provide the configured motion effects.

All actuators must be configured with the same settings.
This applies to both:
Different configurations between individual actuators can cause them to move out of sync. This may result in some actuators extending or retracting incorrectly, causing them to lose proper contact and the rig to become unstable or start rocking.
Always ensure that all actuator parameters are identical to maintain balanced, synchronized, and safe platform movement.