
To operate the Reactor Tension, the SimHub software is required.
This setup guide applies to the standalone use of the Reactor Tension.
If you are using the Tensioner as an add-on together with the Reactor Motion System, please continue here
Die neuste Version von Simhub kann unter folgendem Link heruntergeladen werden:
Führe die Installationsdatei aus und folge den Schritten um Simhub zu installieren
Um Simhub uneingeschränkt nutzen zu können werden zwei kostenpflichtige Lizenzen benötigt
– allgemeine Simhub Lizenz
– Simhub Motion Addon Lizenz
Launch the Simhub application on your computer to begin the setup process.
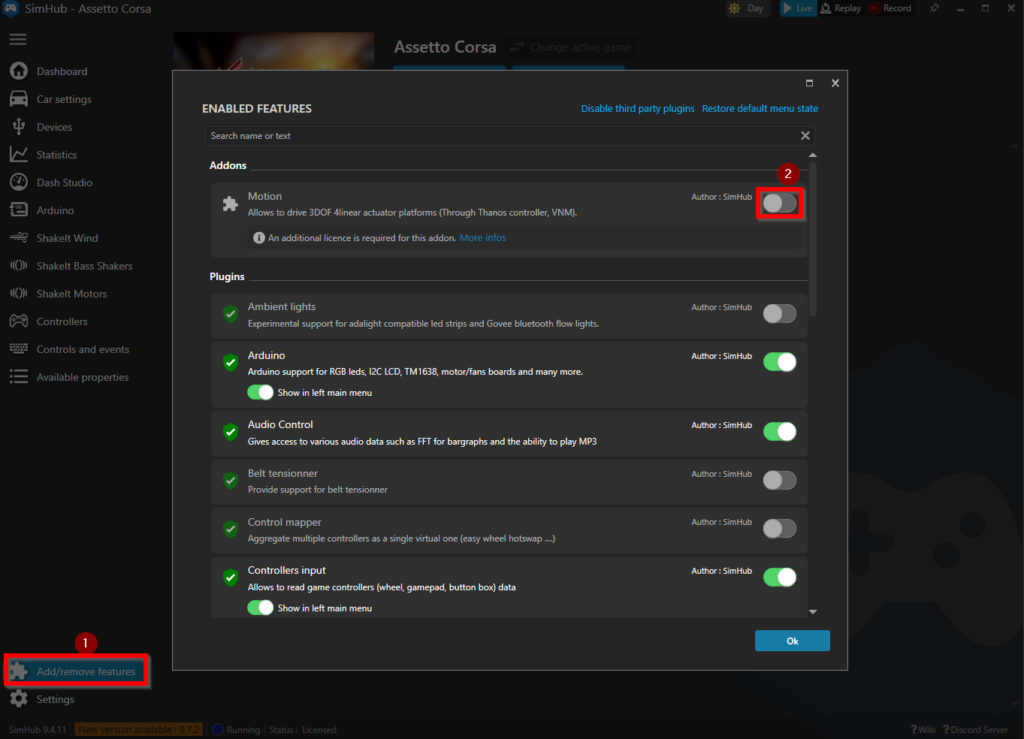
Once Simhub is running, the motion addon need to be enabled
1.) Klicke auf "Add/Remove features"
2.) Aktiviere den Schieberegler des Motion Addons
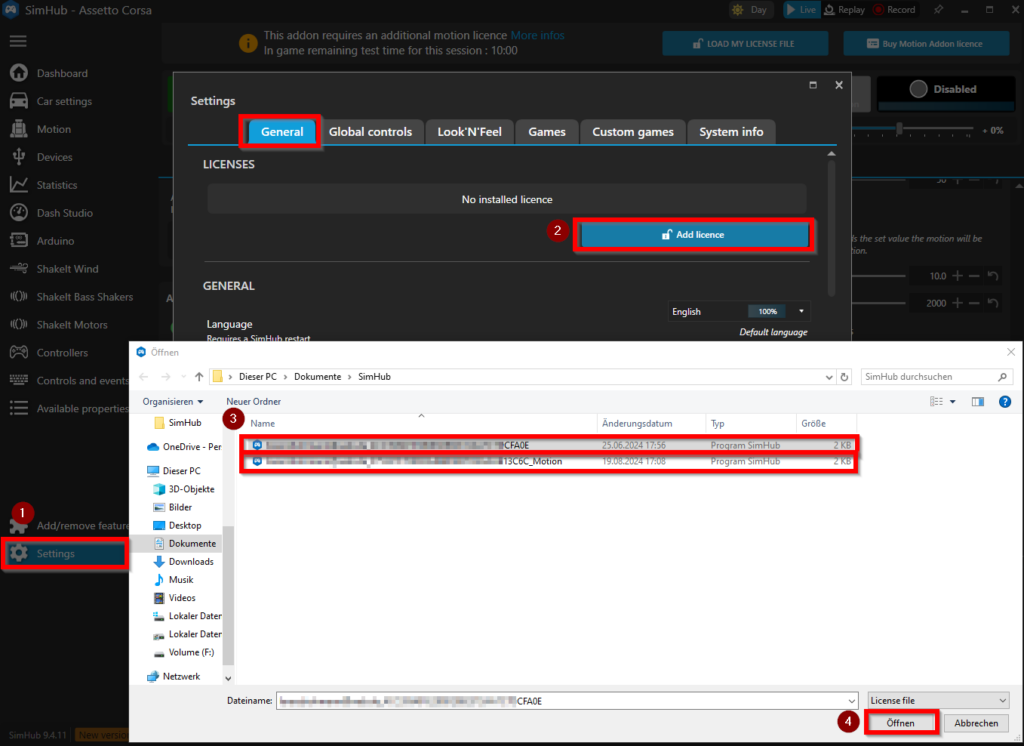
Speichere die beiden gekauften Simhub Lizenzen auf dem Computer, die Lizenzen werden von simhub per email nach dem Kauf bereitgestellt.
1.) Navigiere zu "Settings -> General"
2.) Klicke auf "Add license"
3.) Wähle die gespeicherten Simhub Lizenzen vom Computer (nur eine Lizenz kann gleichzeitig aktiviert werden)
4.) Klicke auf Öffnen im File-Browser
5.) Wiederhole die Schritte um die zweite Lizenz zu aktivieren
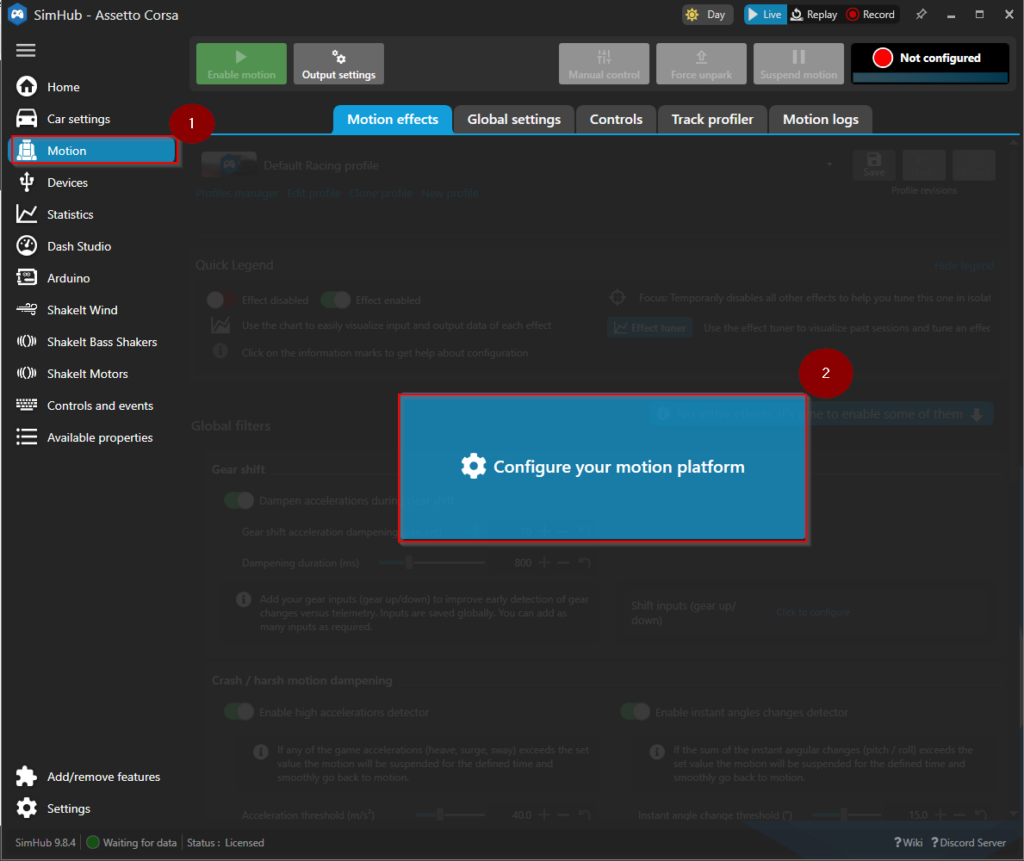
Die nächsten Schritte richten das Motion System ein
1.) Klicke auf "Motion"
2.) Klicke auf "Configure your Motion platform"
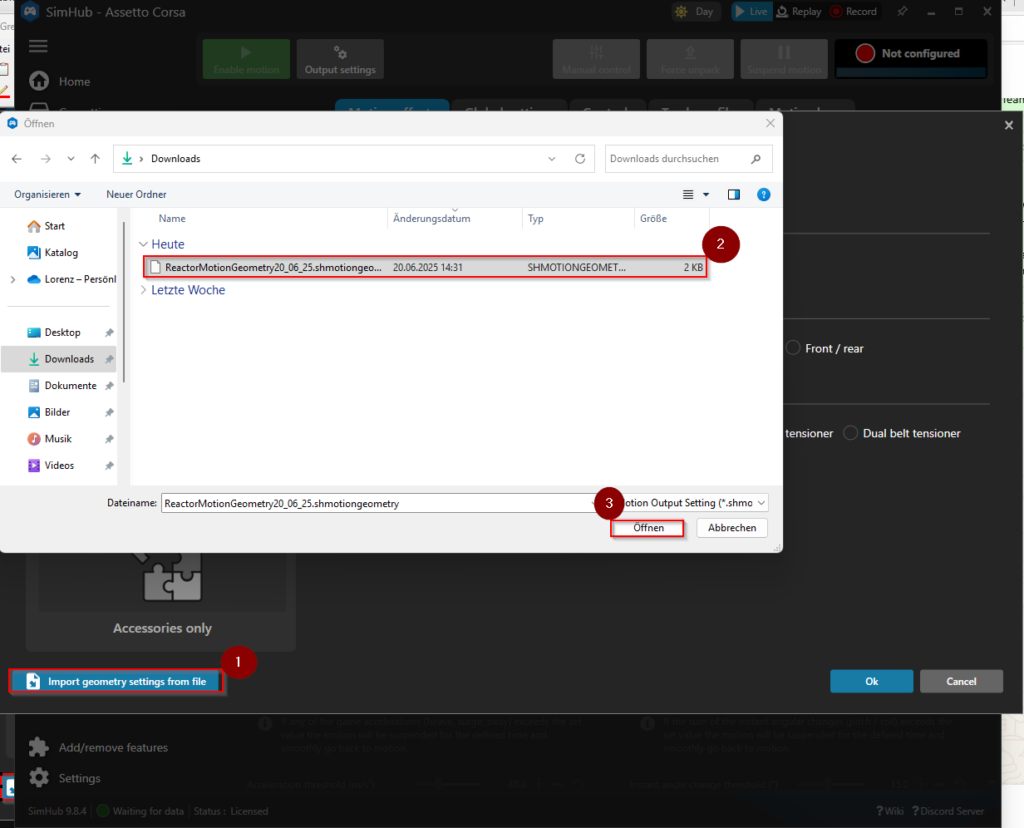
Download our pre-configured geometry configuration from SimReactor
1.) Klicke auf "Import geometry settings from file”
2.) wähle die zuvor gedownloadete Datei "*.shmotiongeometry” aus dem Dateifenster
3.) Öffne die Datei
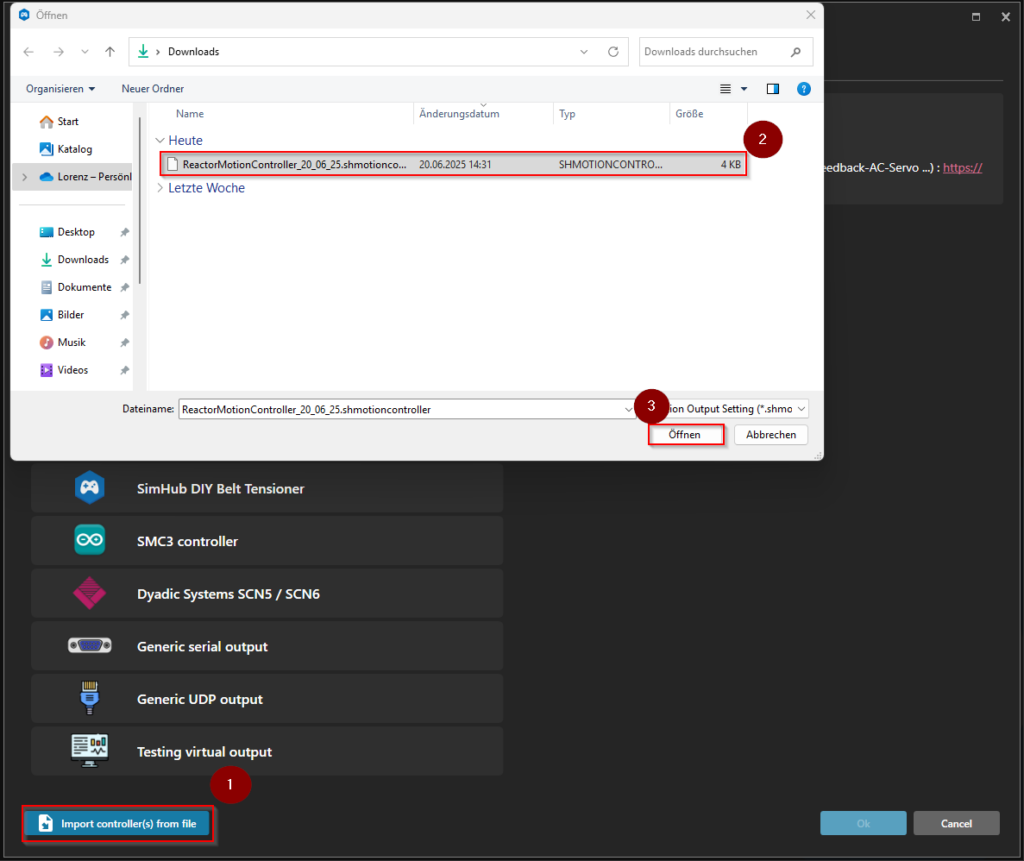
Download our pre-configured output controller settings from SimReactor
1.) Klicke auf “Import controller(s) from file”
2.) wähle die zuvor gedownloadete Datei "*.shmotioncontroller” aus dem Dateifenster
3.) Öffne die Datei
Abstand zwischen den Aktuatoren kann je nach Rig variieren. Um die beste Motion Erfahrung bei unterschiedlichen Platformgrößen zu gewährleisten, ist es wichtig die individuellen Abstände zwischen den Aktuatoren in Simhub einzustellen.
1.) Press on “Settings” of your Motion controller
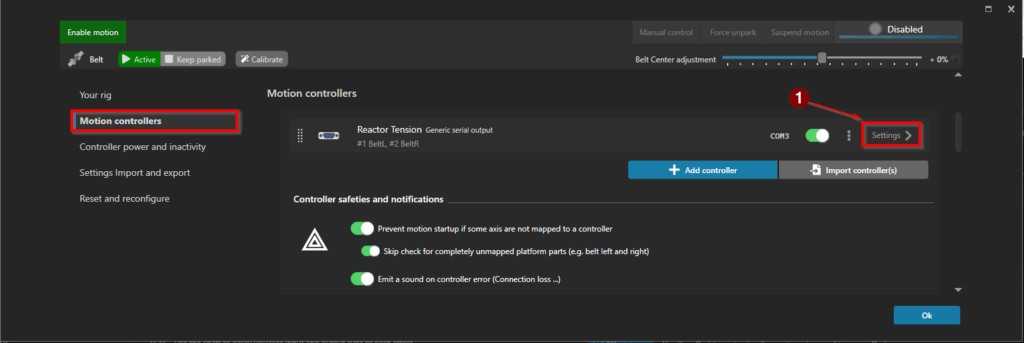
2.) Navigate to Controllers and choose the COM port the control unit is connected to via USB, in most cases it is shown as “FTDI”, if you can not find it, use the “identifiy” button
3.) Then press “Edit axis assignments”

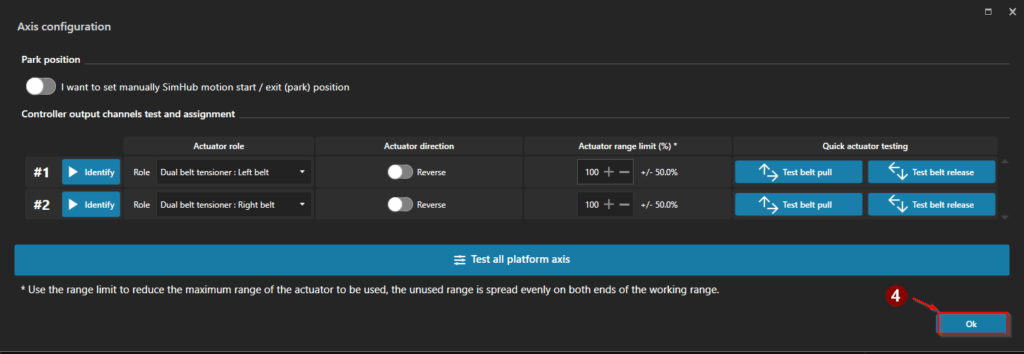
4.) Axis are already assigned, please press “Ok”
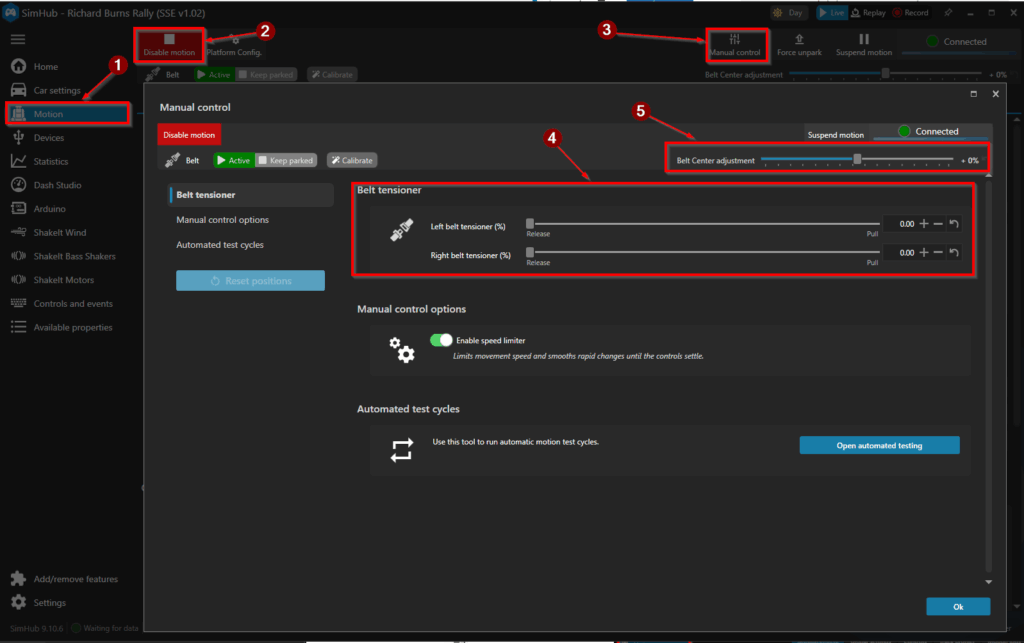
Now we can do a function test
1.) Navigate to “Motion”
2.) Press “Enable Motion”
3.) Go to “Manual Control”
4.) Use the sliders to increase slowly the tension of the seatbelt on each site
5.) Use the slider to adjust the belt center. This helps reduce friction in the seatbelt system so there is no dead zone when a signal is applied.
Increase the offset gradually until the seatbelt starts to pull. Then, decrease the offset slowly until the pull just disappears.
Congratulation, your seatbelt is now ready for your favourite games. Some games need additional steps to activate telemetry data for simhub. Follow instructions on the simhub software.